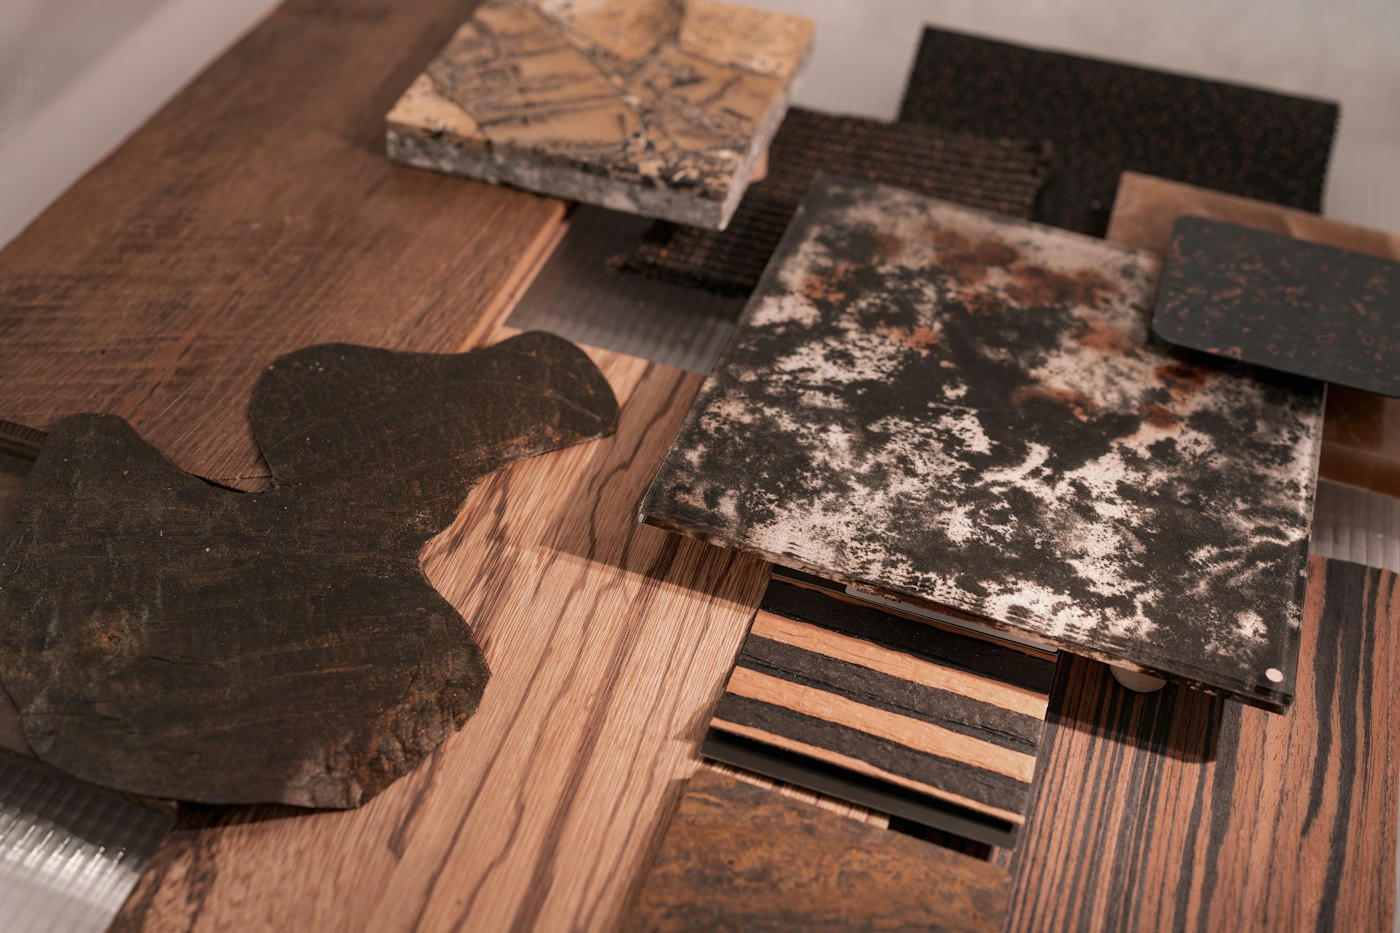
Most remodels begin with saved images: a kitchen seen online, a bathroom in a magazine, a friend’s pantry. The trouble is that a hundred saved photos do not add up to a plan. A mood board is the tool that bridges the gap. Done well, it narrows your taste into a handful of clear choices that a designer or contractor can build from. Done poorly, it is just another pile of pictures.
Collect Widely, Then Look for Patterns
Begin by gathering without judgment. Save anything that appeals to you, including rooms that are not kitchens or baths, pieces of furniture, landscapes and even clothing. After a few weeks, lay everything out and look for what repeats. Maybe every room you saved has warm wood, black accents and a lot of daylight. Maybe the common thread is simple lines and very little pattern. Those repeated elements are your real preferences, and they are more reliable than any single dramatic photo.
Be just as attentive to what you skipped. If you never saved a glossy white kitchen, that tells you something, even if those kitchens are everywhere.
Edit Down to One Board
A working mood board should fit on one page or one screen. Choose a small number of images, usually fewer than ten, that together express the feeling you are after. Then add the specifics that photos alone cannot show: a paint chip, a tile sample, a cabinet door sample, a countertop chip, a swatch of the metal finish you like. Physical samples matter because screens distort color and cannot show texture. Seeing a stone sample next to a cabinet color in your own light will tell you more than any amount of scrolling.
- Limit yourself to two or three main materials and one or two accents.
- Include at least one photo of your current room so the board stays grounded in reality.
- Write a few words that describe the mood: calm, bright, cozy, crisp.
Separate Style From Function
A mood board captures how a room should look and feel. It does not capture how it should work. Keep a separate list of functional needs: a place for the dog bowls, a landing spot for groceries, a shower someone can use with a cast on. When the two documents sit side by side, you can see where style and function agree and where they might conflict, such as a love of open shelving paired with a family that never puts dishes away.
Use the Board to Make Decisions
The point of all this is to decide. When you are faced with four backsplash options, hold each one against the board and ask which belongs. When a contractor suggests a finish you had not considered, the board gives you a quick way to judge whether it fits. It also keeps everyone involved aligned, since a single page of images and samples is far easier to interpret than a folder of loosely related photos.
Expect the board to evolve. As you see real samples and learn what is available, some elements will drop out and others will sharpen. That is the board doing its job. By the time your project begins, it should read less like a wish and more like a set of instructions you believe in.
A Step-by-Step Mood Board Process
Here is a practical sequence we recommend to homeowners who want their mood board to become a working document rather than a collage.
- Set a collection period. Give yourself a few weeks of open-ended saving, then stop and review. A clear cutoff prevents the board from growing endlessly.
- Review in one sitting. Look at everything at once and sort images into piles of “strong yes,” “maybe” and “not really.”
- Name the patterns. For each “strong yes” image, write down what you love about it: the color of the wood, the size of the tile, the amount of light, the shape of the hardware.
- Translate patterns into materials. Turn each repeated element into a sample you can hold: a cabinet finish, a countertop chip, a tile, a paint color, a metal finish.
- Build the board. Arrange your edited images and samples together on a single page, foam board or tray.
- Test it in the room. Place the physical board in the space being remodeled and look at it at several times of day.
- Revise and finalize. Replace anything that does not feel right in person, and note what each final element represents.
Mood Board Mistakes We See
- Too many hero images. If every photo is a showstopper, the board loses focus. A few strong images and several quiet supporting ones usually work better.
- Ignoring the rest of the house. A kitchen board that has nothing in common with the adjoining living room can lead to a jarring transition. Include a photo of the neighboring space.
- Relying only on screens. Digital boards are useful, but colors on a monitor or phone rarely match real materials.
- Forgetting the floor and ceiling. Boards often focus on cabinets and counters while overlooking flooring, ceiling color and lighting, which affect the room just as much.
- Choosing every element at the same intensity. If the tile, countertop and cabinets all have strong patterns or colors, they will compete. Decide which element leads.
Making the Board Useful for the People Who Build It
A mood board becomes even more valuable when it communicates clearly with whoever is designing or building the project. A few additions help.
- Label each sample with the product name, color and finish, if known.
- Mark what is decided and what is still open, so no one assumes a placeholder is final.
- Note your must-haves and deal-breakers in a short list beside the board.
- Keep a digital copy so the board can be shared and referenced easily.
Mood Board Questions We Hear
Do I need a designer to make a mood board?
No. Many homeowners create excellent boards on their own. A designer or contractor can then help refine it and translate it into specific products and details.
What if my partner and I have different tastes?
Have each person collect separately, then compare. Most couples find more overlap than they expected, and the places where tastes differ can often be addressed by assigning one person’s preference to a single element.
How do I know when the board is finished?
When you can hold a new option up to it and quickly know whether it belongs, the board is doing its job. It will still change a little as the project develops, and that is perfectly normal.